The story of our Sheepwagon
This is the story of our sheepwagon. How it came to be ours and the journey from neglected camp to charming vacation rental.
Have you ever come across something and you just couldn’t get it off your mind? That is exactly what happened to my husband from the very first time he laid eyes on our sheep wagon. Let’s dive in to the fun story of taking our wagon from sad to charming, starting with the big task of getting it home.
How our sheepwagon came to be
You may or may not know this from my other posts, but hi, I’m Sari and I have dairy sheep! What you might not know is I had to beg my husband for months to let me get sheep.
He just had it in his head that they would not be fun. I don’t know where he got that idea. Anyway, I begged. He caved. Now we have sheep.
Well not long after I started bringing sheep home, Facebook decided to show my husband (his name is Jayce) an ad for an old sheep wagon for sale. He was instantly obsessed. He thought about it night and day for weeks before finally we decided if we are going to have sheep, we obviously need a sheepwagon and agreed to go look at it.
Going to look at the sheepwagon
We headed off to the middle of nowhere Montana in January so we encountered the typical fun things like snowy and icy roads. When we finally arrived at the destination we gave the sheep wagon a quick look over. It looked a little sad.
It had some rot and a lot of mouse poop. But it was still sturdy. I considered trying to bargain with the owner on the price. He mentioned he had others planning to come look at it after us, so we thought better of it and paid the man his asking price.
Getting the sheepwagon home
Next we came up with a plan for picking the sheep wagon up and getting it home.
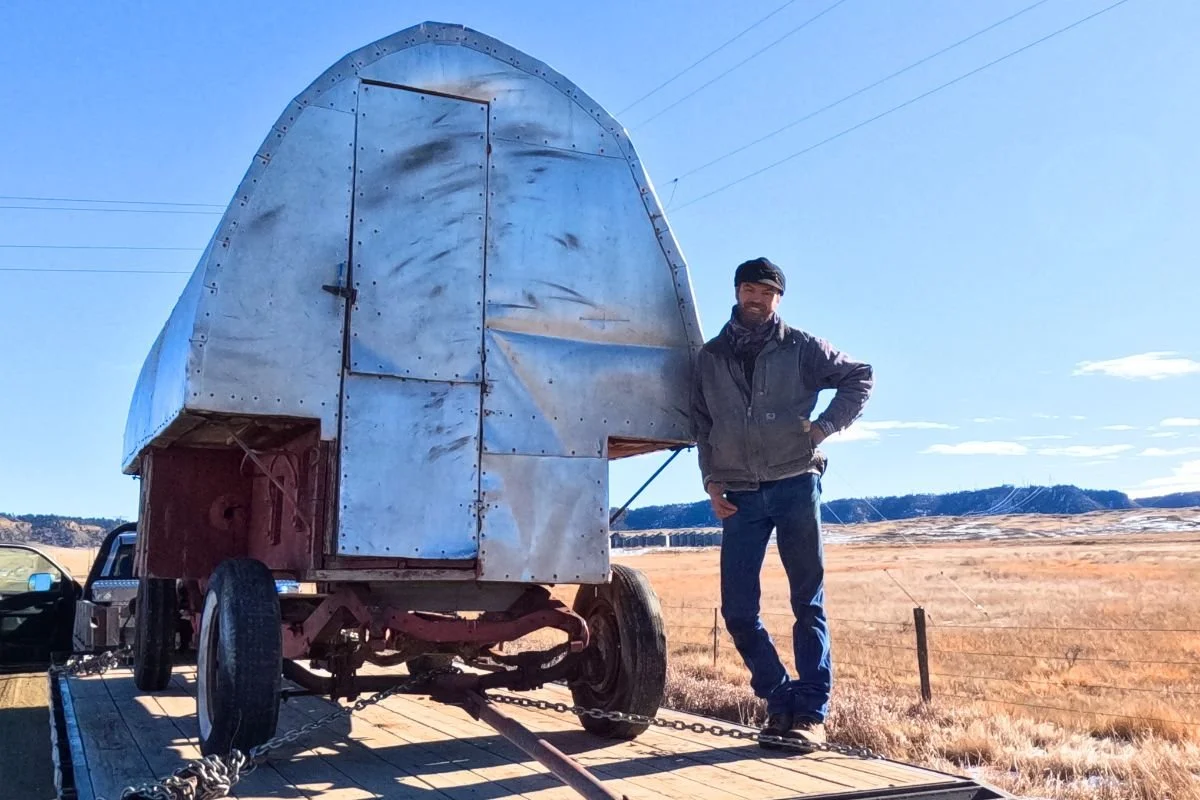
A few weeks later we went back to the middle of nowhere on snowy and icy roads, this time with a 30ft trailer, to bring the sheepwagon home. First we tried pushing the sheep wagon up onto the trailer backwards with a four wheeler. Nope too heavy and not enough traction with the snow and ice on the ground.
Next we tried with a full size pickup. That had enough power but the steering was miserable and the sheep wagon kept going on the trailer catty whompus. Finally Jayce suggested using a come along to load the sheepwagon and thank goodness that finally worked!
The next big question was how to strap it down? See strapping it down seems simple and innocent enough, until you realize that the actual wagon part of the sheep wagon just sits on top of the car frame, nowhere is it actually bolted down!!
Well Jayce didn’t want to throw a strap over the top in case it damaged one of the bows, so that idea was out. We decided to just chain down the frame that it sits on and poke carefully home. That worked great while out on the windy gravel road.
But eventually, we got onto the highway where our speed needed to pick up. And when our speed went up, well lets just say so did the sheepwagon! That’s right, the entire top of the wagon started lifting off of the frame WHILE WE WERE DRIVING! Panicked, we pulled over and Jayce tied down the four corners of the wagon with good ol’ baling twine. After that we hit the main highway and did 70 the rest of the way home with no worries. Never underestimate the power of baling twine. This is big square bale twine with 1,000lb tensile strength. So we figured if it broke, we had other problems!
Fixing the Sheepwagon up
Once home, Jayce carefully unloaded the wagon with his skid steer and parked it outside of his shop so that all the mouse families could vacate before he took it inside.
Cleaning it out
The first step of the restoration project was a dirty one. Jayce cleaned the wagon out and vacuumed out all of the mice and their droppings.
Repairing the rot in the sheepwagon
After that he got to work repairing all of the rotted out portions of the sheep wagon. All four corners of the wagon had rot that needed to be repaired. Both grub boxes (storage boxes) had to be rebuilt. The front door was a complete loss. Jayce picked through old cedar my dad had cut out in Washington State many years ago to match the look to the rest of the wagon.
Sealing leaks & stove repairs
Next up was sealing up the leaks. Jayce peeled the outside tin off the wagon and replaced all of the rubber washers on the screws so they wouldn’t leak anymore. Next he retrofitted new stove pipe to fit (they don’t make the right size anymore). After that he pulled the stove out, repaired the bent leg and refinished it with stove black before plumbing it back in.
Hand forged touches by our very own blacksmith
Another large repair that had to be made was the grain box. Many boards had to be removed and replaced. Jayce added an old milk cow stanchion chain that we found on our place as a tailgate chain For the grain box lid. He also hand forged a hook and latch for it. If you are interested, you can watch a video about that process here.
Speaking of hand forged items for the wagon, Jayce also forged a very cool latch for the outside grub box. It was inspired by a latch made out of a rasp at an old sheep barn not far from where we live.
Additional hand forged items included a broom holder, a window latch and a mirror hanger. All sheepwagons always had a broom hung by the door outside the wagon.
Making changes
During all of this work the main goal was to keep the patina and originality of the wagon as much as possible. However, one thing we did decide to change was the size of the bed. The sheep wagon originally had just a twin size bed, and Jayce expanded it out 17” to make it a full sized to accommodate two guests. This meant he also had to move the table, but we believe the sheep wagon is still plenty roomy!
Interior work
After Jaycee finished all of his work, I got started inside the wagon. First I scraped as much of the old peeling paint off as I could. Then we taped everything up, and got started painting. Let me tell you, for a small space the sheepwagon is no easy task to paint! But we got it done and wow what a difference!
40’s era style
Now the fun part. We started picking up fun vintage pieces to outfit the wagon. We were given the advice by a fellow sheep wagon aficionado to pick a generation and go with it. Since the car frame under the sheep wagon appears to be from a 40’s-50’s era car, we decided to go with that generation.
We outfitted the wagon with a vintage quilt, a sheepskin rug, porcelain enamel cookware, antique sheep shears, a bell, a restored wagon coffee grinder and more! We also added hubcaps, not because sheep wagons had them, but just because we thought they were too cool to not have.
It’s ready! Our first sheepwagon guests
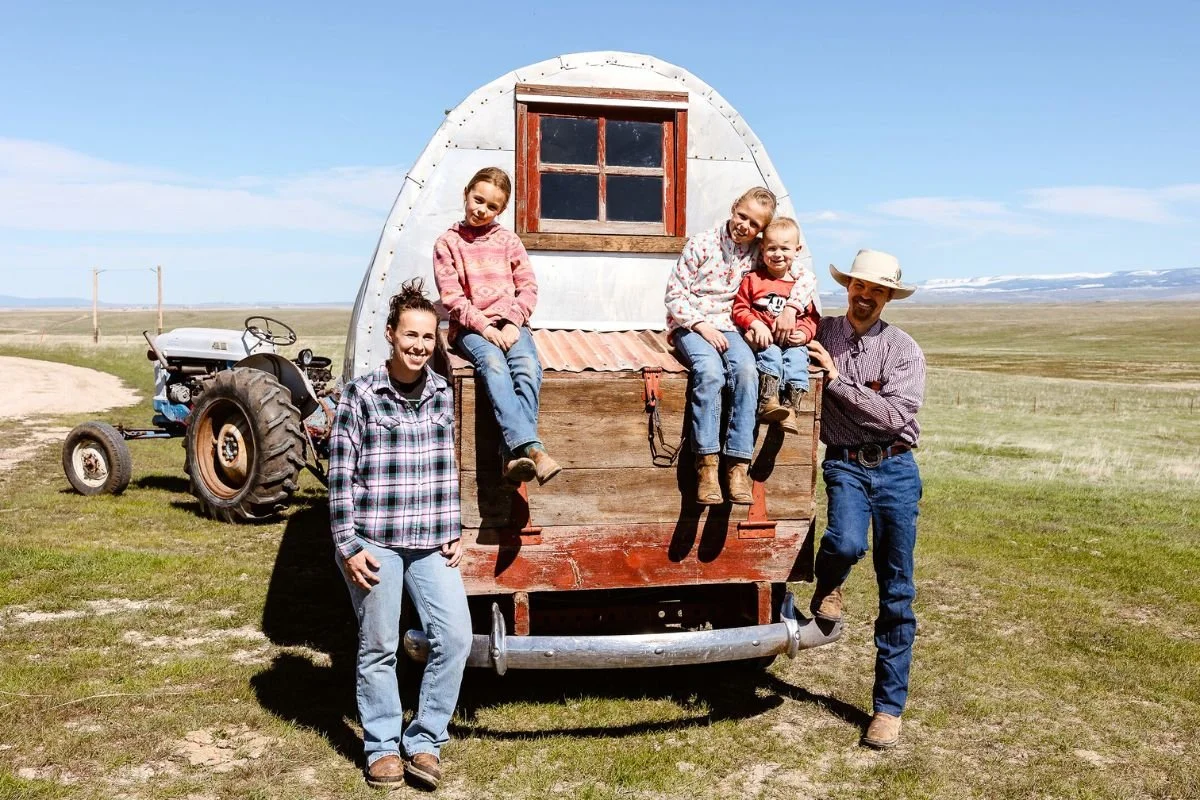
Finally it was ready. We decided our family would be the first to spend the night in it before putting it up on airbnb to share with others. We let our daughters invite a friend over to join in on the fun. Unfortunately they decided it would be more fun in the sheep wagon without mom and dad and baby brother, so we let them christen the wagon by themselves. With three eight year old girls, you can only imagine the giggles coming out of that wagon late into the evening. To top it all off, the northern lights decided to show themselves that night, a first sighting for myself and the girls.
Jayce and I still haven’t had a chance to stay in our own sheep wagon. We feel so blessed that it has stayed busy this summer and everyone has enjoyed their time in our sheep wagon. We hope you have enjoyed this story about our sheep wagon and we hope that you too will come stay with us and revel in the unique experience that the sheep wagon is.
If you enjoyed this post, check out this post here that explains more about what a sheep wagon is and why you might want to stay in one.
Pin this for later


