Parmesan Cheese from Skim Milk
A Traditional Hard Cheese from What Many Consider a Waste Product
Did you know you can make rich, flavorful Parmesan cheese from skim milk? It’s a wonderful way to transform what some call a “waste product” into something truly delicious—though feeding it to pigs is still a great option too (it just feeds your family more indirectly!).
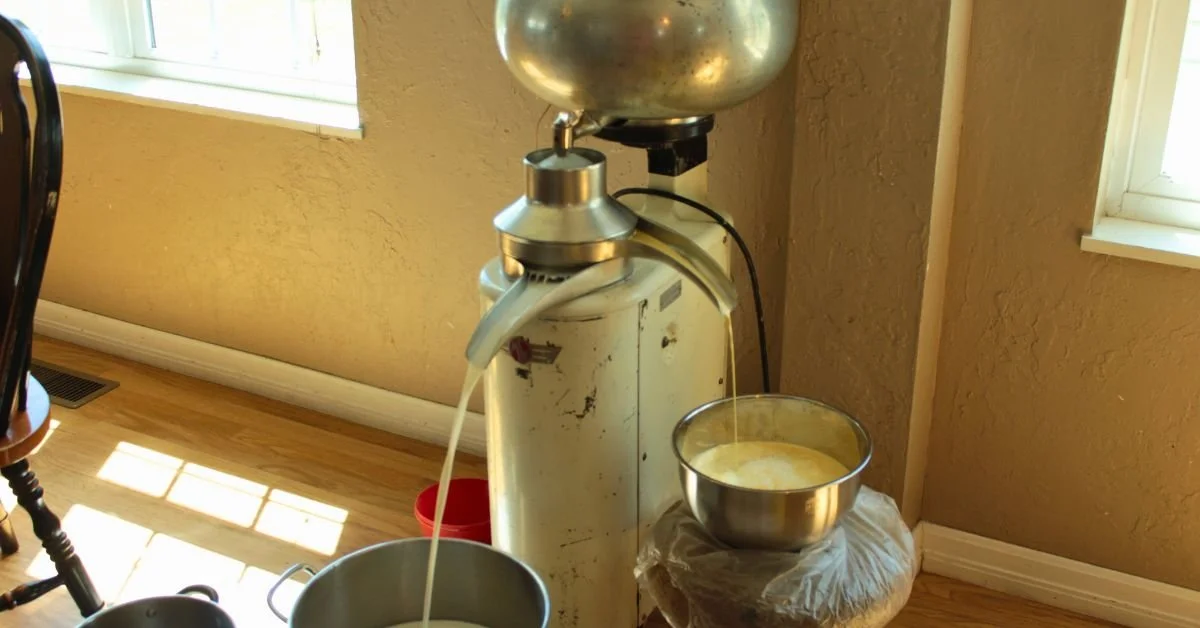
Whether you’ve hand-skimmed your milk or run it through a separator, this recipe is designed to help you make the most of your cream-stripped milk. Hand-skimming will leave you with more butterfat in the milk (and thus a higher cheese yield), while separator-skimmed milk gives you more butter and buttermilk—but less cheese.
👉 Watch the full video tutorial on my YouTube channel to follow along step by step!
Step 1: Skim Your Milk
Use hand-skimming or a cream separator to remove most or all of the cream from your milk.
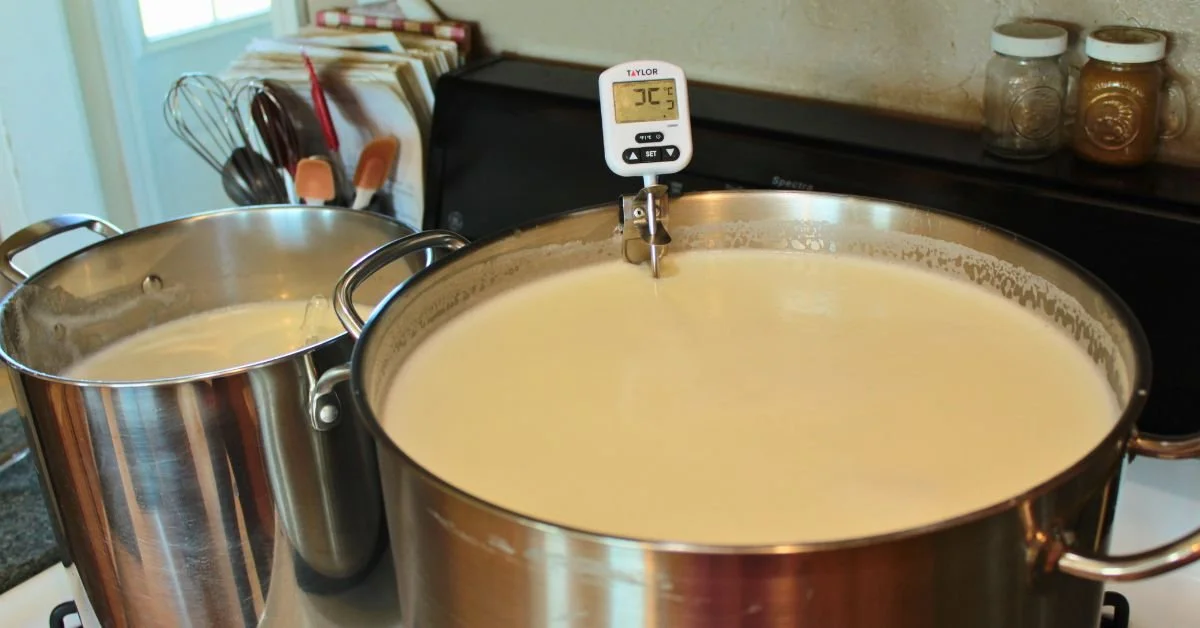
Step 2: Heat and Culture
Heat your milk to 35°C (95°F). If you’ve already warmed it for separating, you’re good to go.
Add Your Thermophilic Culture:
Freeze-dried: Use 1/8 tsp per gallon. Sprinkle on the milk’s surface and let sit for 2 minutes to rehydrate, then stir.
Clabber or Yogurt: Use 1/4 cup per gallon. Shake or whisk to thin, then stir in.
Tip: Use fresh and active clabber for the best results—ideally fermented the night before or refrigerated no more than 24 hours.
Step 3: Let the Culture Activate
Let your milk sit for 15 minutes if using freeze-dried cultures.
Skip this step if using clabber or yogurt, as those are already active.
Step 4: Add Lipase (Optional)
Lipase boosts flavor, especially in skim milk.
Use 1/8 tsp lipase per gallon, diluted in 10 ml water.
Stir gently to incorporate.
Note: Raw milk already contains lipase, so you can skip this if using raw.
Step 5: Add Rennet
Use 1.25 ml (1/4 tsp) of single-strength rennet per gallon.
You may dilute it in 20 ml water, but it’s not required.
Stir gently in an up-and-down motion for 30 seconds.
Then still the milk and cover to let set for 45 minutes.
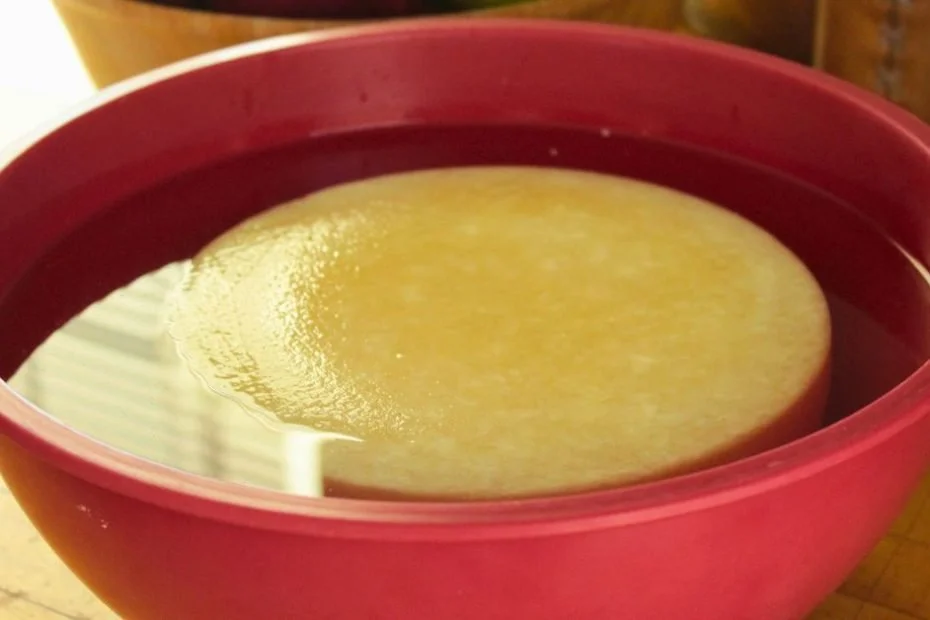
Step 6: Check for a Clean Break
Test the curd by making a shallow cut, then lifting gently with a knife. The curd should split cleanly, and the whey should be clear.
If not, wait 15 more minutes and try again.
Step 7: Cut the Curds
Use a whisk to create small, rice-sized curds:
Insert whisk vertically, lift straight up.
Repeat across the pot. Do this 2–3 times for consistency.
Let curds rest for 5 minutes before stirring.

You can see here how much the cut curd has sunk under the whey after a 5 minute rest.
Step 8: Stirring – Lots of It!
Parmesan requires extensive stirring to dry out the curds properly.


First Stirring (10 minutes at 35°C / 95°F)
Gently stir, lifting curds from the bottom and breaking up larger ones.
Second Stirring (30 minutes, raise to 42°C / 107°F)
Slowly increase temp, about 1°C every 4 minutes.
Stir constantly.
Third Stirring (30 minutes, raise to 52°C / 125°F)
Continue slow heating and constant stirring.
Switch to using your hand if you want a better feel for the curds.
Curd Test:
Should be the size of a grain of rice.
Should squeak when chewed.
Should clump and then break apart when squeezed.


Let curds rest for 5 minutes.
Step 9: Drain the Curds
Pour through a cheesecloth-lined colander.
(You may want to ladle out some whey first—remember, the pot will be hot!)
Save your whey for ricotta, baking, or feeding animals.
Step 10: Press the Cheese
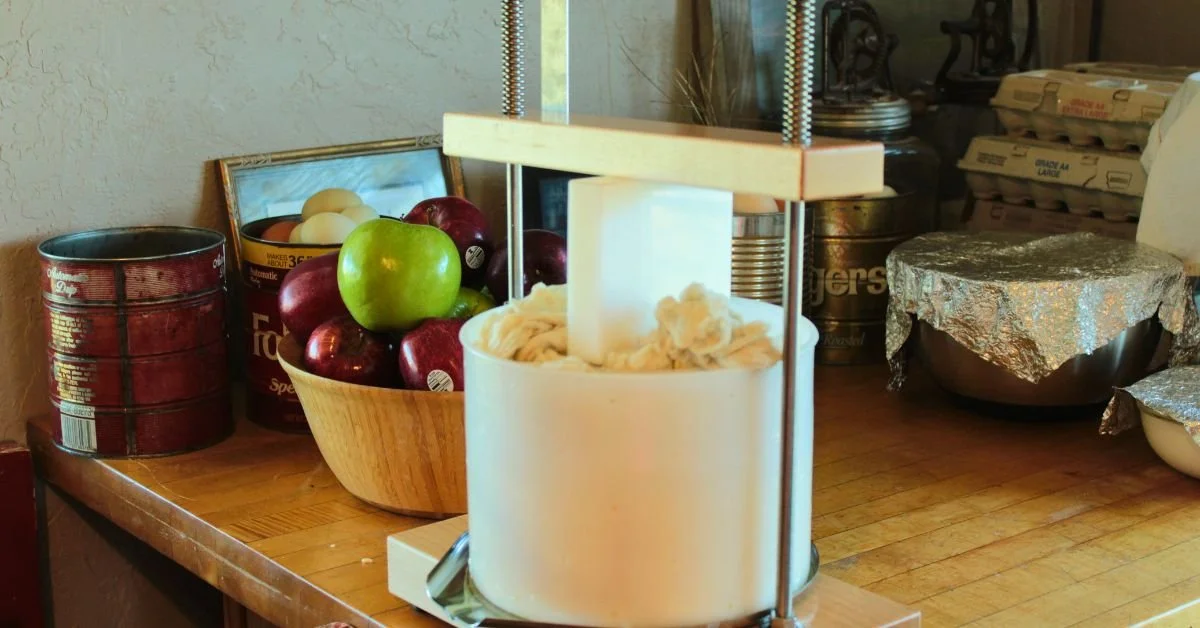
Press with light pressure for 15 minutes.
You want a light drip, not a stream.
Flip, redress, double the pressure, and press 30 minutes.
Flip, redress, increase pressure slightly, press for 2 hours.
Final Pressing:
Flip, redress, increase pressure again, and press overnight (12 hours).
In the morning:
Check the rind. If it’s smooth and sealed, continue.
If not, press again with more pressure for a few more hours.
Step 11: Brine the Cheese
Weigh your cheese. Brine at 12 hours per pound of cheese.
Flip halfway through.
If it’s not fully submerged, salt the exposed side and flip halfway.
Step 12: Air Dry
Let cheese dry for a couple days until dry to the touch.
Flip several times per day.
I use dry cheesecloth on a rack and cover the top with cheesecloth to keep flies off.
Step 13: Age Your Cheese
Parmesan needs to age 6–12 months at 50°F with 85–90% humidity.
For best results, age with a natural rind.
If humidity is hard to control (like in my cheese cave), vacuum sealing is a good alternative.
Final Thoughts
Making Parmesan from skim milk takes time and effort—but it’s absolutely worth it. You get a delicious, hard grating cheese from milk that might otherwise go to waste.
👉 Watch the video tutorial on YouTube here
Let me know in the comments if you try it, and feel free to share how it turned out!
Related Content You’ll Love
How to Make Butter from Cream
After you’ve skimmed your milk for Parmesan, don’t let that cream go to waste! Turn it into rich, delicious cultured butter with this step-by-step guide.
👉 Learn how to make butter from skimmed cream here
Skim Milk Parmesan
Don't toss that skim milk after making butter, make this parmesan!
Ingredients:
1 gallon milk
1/8 tsp freeze dried thermophilic culture (or use 1/4 cup yogurt or clabber)
1/8 tsp Lipase (optional)
1/4 tsp rennet (single strength)
18% salt brine
Heat milk to 35℃ / 95℉. If you heated milk to separate it should already be the correct temperature.
Add culture: Freeze-dried: Use 1/8 tsp per gallon. Sprinkle on the milk’s surface and let sit for 2 minutes to rehydrate, then stir.
Clabber or Yogurt: Use 1/4 cup per gallon. Shake or whisk to thin, then stir in.
Let milk sit for 15 minutes for culture to activate if using freeze dried culture. If using clabber or yogurt skip this step since those cultures are already active!
Add lipase if desired: Use 1/8 tsp lipase per gallon, diluted in 10 ml water. Stir gently to incorporate.
Add rennet: Use 1.25 ml (1/4 tsp) of single-strength rennet per gallon. You may dilute it in 20 ml water, but it’s not required. Stir gently in an up-and-down motion for 30 seconds. Then still the milk and cover to let set for 45 minutes.
Check for a Clean Break: Test the curd by making a shallow cut, then lifting gently with a knife. The curd should split cleanly, and the whey should be clear. If not, wait 15 more minutes and try again.
Cut the Curds: Use a whisk to create small curds. Insert whisk vertically, lift straight up. Repeat across the pot. Do this 2–3 times for consistency. Let curds rest for 5 minutes before stirring.
First Stirring: Check temp to make sure you're still at the target temp of 35°C / 95°F. Gently stir, lifting curds from the bottom and breaking up larger ones, for 10 minutes.
Second stirring: Stir for 30 minutes, slowly raising the temperature to 42℃ / 107℉ turning the burner on and off as needed to increase the temp about 1° every 4 minutes.
After the 30 minutes is up, maintain that temperature for another 15 minutes while continuously stirring. I like to switch between the whisk and my hand, I can get a better feel for the curds with my hands vs a whisk or spoon.
Third Stirring: Stir for 30 minutes, slowly raise temperature to 52°C / 125°F while constantly stirring.
Test curds for doneness: Curds should be the size of a grain of rice. They should squeak when chewed. When squeezed together, they should hold their shape then easily crumble apart.
Let curds rest for 5 minutes.
Drain the curds: If I am doing a large batch I scoop the whey off down to the level of the curds so the pot isn't so heavy. Pour the remaining curds and whey through a cheesecloth lined mold.
Press your cheese: Put your mold into your press and press lightly for 15 minutes. Whey should be dripping out of the mold, not streaming.
Flip, redress and press at double the pressure for 30 minutes.
Flip, redress and press at an increased pressure (your goal is for whey to just be dripping out) for 2 hours.
Final flip: flip, redress and press at an increased pressure for 12 hours
Brine: Remove cheese from the press and brine in an 18% salt solution for 12 hours per pound of cheese. Flip halfway through the brining time. If any of the cheese is exposed outside of the brine dust it with salt.
Air dry: Leave to dry for 1-2 days or until dry to the touch. Flip 2-3 times per day. Cover with a cloth or cover to keep bugs off of it.
Age at 50℉, 85-90% humidity for 6-12 months. Parmesan should have a natural rind if you have the humidity to make that work. I chose to vacuum seal mine.
cheese, dairy recipes, raw milk
Pin for later
Tags:AGING CHEESE AT HOME, CHEESEMAKING TUTORIAL, CREAM SEPARATOR, DIY CHEESE, FROM SCRATCH COOKING, HARD CHEESE RECIPE, HOMEMADE CHEESE, HOW TO MAKE CHEESE, PARMESAN CHEESE