How to Make Butter from Sheep Milk (Step-by-Step Guide)
Yes, you can make butter from sheep milk! It’s rich, creamy, snow-white, and just a little softer than cow’s butter—perfect for spreading or baking. In this post, I’ll walk you through exactly how we make butter from our own sheep milk here on the farm.
Why Make Butter from Sheep Milk?
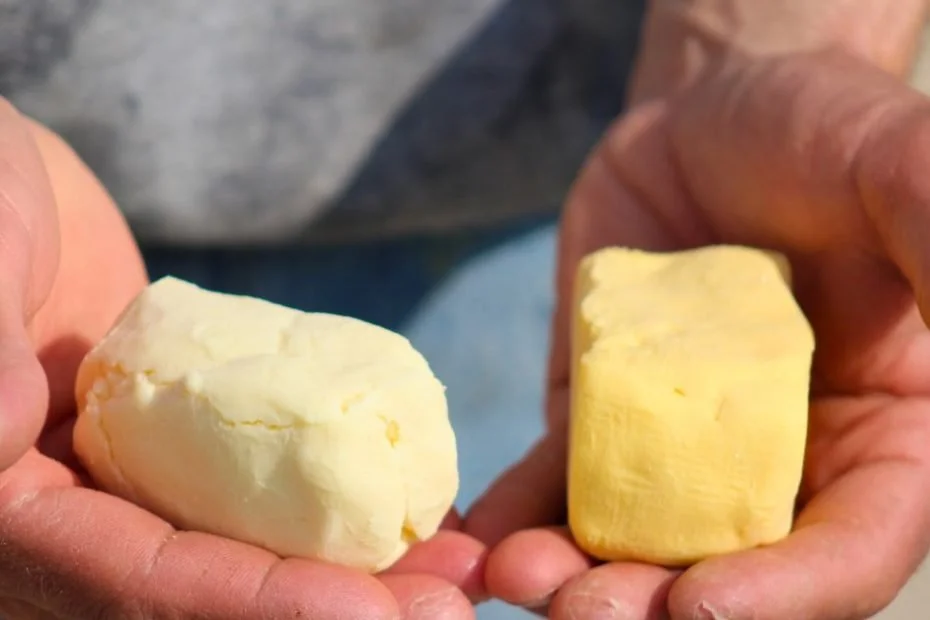
Sheep milk is high in fat and solids, which makes it perfect for cheesemaking and butter. The flavor is mild and sweet, and the butter is naturally white due to the lack of carotene (unlike the golden yellow butter from cows).
Plus, making your own butter means no waste—you can use the tangy, cultured buttermilk for baking!
Step 1: Separate the Cream
Sheep cream doesn’t naturally rise to the top like cow cream does, so you have two options:
Churn whole milk (yes, really!)—sheep and goat milk have a naturally homogenized quality.
Use a cream separator, which is what we do. Ours is a vintage separator that still works like a charm.
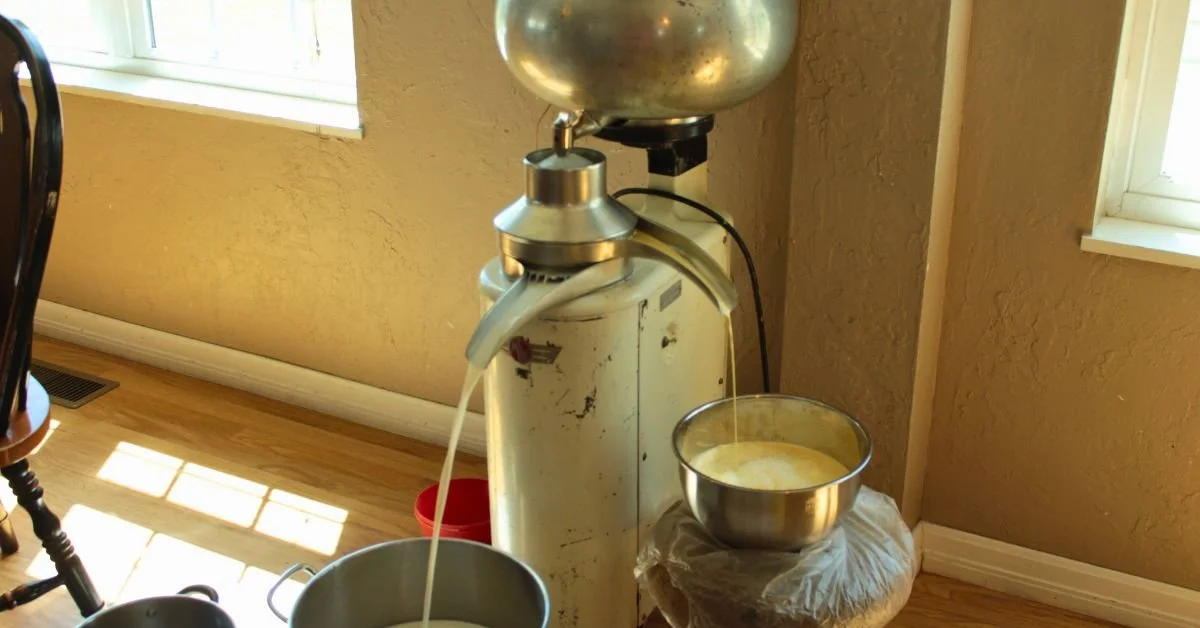
Separating cows milk with our 1940’s Montgomery Ward separator.
We usually collect 12–15 gallons of milk over a few days, then warm it to body temperature (around 100°F) before separating.
Step 2: Culture the Cream (Optional, But Recommended)
Culturing your cream adds flavor to the butter and creates real, thick, tangy buttermilk instead of the thin, brown liquid known as old fashioned buttermilk.
Add 1–2 tablespoons of clabber to the cream after separating..
Cover and let it sit at room temperature for 12–24 hours.
Then refrigerate the cream for a few hours or overnight before churning.

Sheep cream on the left and cow cream on the right. See the difference?
💡 Don’t stress too much about temperatures—ideal churning temp is 50–60°F, but it’ll still work even if it’s a bit off.
Step 3: Churn the Cream
You can churn cream using whatever you have on hand:
A Bosch or KitchenAid mixer (cover with a towel—trust me!).
A blender.
Or even a mason jar and some elbow grease—great for a kid-friendly activity!
Churn until the cream breaks—that means the butter clumps together and separates from the buttermilk.
Step 4: Gather & Knead the Butter
Pour off the buttermilk.
Knead the butter by hand or in your mixer.
Keep kneading and pouring off liquid until there’s no more buttermilk coming out.
Now it’s time to wash the butter—this step is essential for longer storage.
Step 5: Wash the Butter
Washing removes leftover buttermilk, which can cause the butter to spoil quickly.
Two methods:
Cold water bowl method: Submerge the butter in cold water and knead, changing the water until it runs clear.
Running water method (my go-to): Knead the butter under cool running water until no more buttermilk droplets form.
If the butter gets too warm and greasy, chill it in the freezer for 10–15 minutes, then continue washing. Repeat as needed.
Step 6: Shape & Store
When fully washed, shape your butter however you like. I use a digital scale and divide mine into 4oz chunks(the size of a store-bought stick). I shape them by hand, then flash freeze them on a tray before storing in a freezer bag.
🧈 You can use butter paddles, but I prefer using my hands—I work quickly enough that it doesn’t get too soft.
FAQs About Sheep Milk Butter
Q: Why is sheep butter white?
A: Sheep don’t store carotene in their milk, so the cream and butter are naturally white—not yellow like cow butter.
Q: Is sheep butter softer than cow butter?
A: Yes, slightly! It’s more delicate and spreadable, especially compared to cow butter in spring when cows are on lush green pasture (which can make cow butter waxy).
Q: Do I have to culture the cream?
A: Nope! It’s optional, but it adds flavor and gives you traditional thick buttermilk as a bonus.
Final Thoughts

Butter season starts as soon as our girls freshen. I like to stock at least 24 pounds of butter in the freezer for the dry season. During early lactation, most of our cream still goes to the babies—but once they’re weaned, I go all in on butter making!
Whether you’re trying sheep butter for the first time or adding it to your homestead skills, I hope this guide helps you feel confident and inspired.
Let me know how it goes!
—Sari 💛
Pin it for later:
